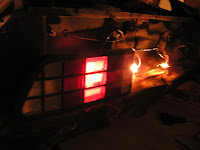
In my previous blog post I mentioned the fact that my passengers side tail light was not working, as it turns out the tail light circuit boards were the problem. There are rivets in the boards that connect each light bulb to the ground and for what ever reason, over time, these rivets lose contact. So there are two options, spend $130 on a new set of boards, or fix the existing boards for $2.50, I chose the latter option. On the right is a picture of the boards before I cleaned them up. There was a good bit of corrosion on them, and it took a couple of hours of cleaning to get them to the point where I was ready to actually fix them. To clean them up, I first using a very high purity (90+%) rubbing alchohol. Why 90+ purity? Because the lower purity stuff is full of water and it takes forever to dry out, which could cause a short if you hook things back up too quickly, where as the high purity alcohol dries almost instantly.
After the initial clean with alcohol, I used some steel wool to remove the corrosion and really clean the boards up. You could also use a very fine grit sand paper as well. If you do clean them with the steel wool, make sure you don't leave any bits of steel wool inside of the light bulb wells or it could cause a short when you hook things back up! Then I again cleaned the boards with alcohol to remove any corrosion residue. Once I was done, they looked pretty good again!
To fix the boards, there are two options. One is to drive some small screws through the rivets so they make better contact with the boards, and the other is to putting a bit of solder around the rivet, insuring the solder also connects with the ground on the board. I felt like soldering was less invasive, and considering I have also had quite a bit of practice with soldering recently I decided to solder the boards. I soldered all of the connections on the boards, even the good board, just to make sure that I don't run into any more bad connections as I test the brake lights and turn signals; so far I have only tested the tail / running lights. The image on the right shows one of the cleaned up and soldered boards.
I hooked the boards back up the the the car and violia, I have completely working tail lights now! This project took almost two hours, but again, I save myself a bunch of money by just fixing the boards myself. It is a pretty easy fix, and I am always amazed how many people just lay out the cash and toss the old boards out with out even thinking twice about it.
Friday, April 23, 2010
Tuesday, April 20, 2010
Lights!
I now have rear lights. The rear harness for the lights was really chewed up by some animals that once made this car home. All of the ground wires were severed, both side marker lights were completely severed, and some other wires were also chewed in half. I soldered each connection and then covered each repair with heat shrink tubing to provide some extra strength to the repairs. I am very happy with the result, and with a new harness from DMC costing $279.71, and these repairs costing about $15.00 and some of my time, it was definitely the right way to go. I did my best to some what match the color of the wires I was splicing, but the hardware store only had red, black and white wire. Fortunately most of the wire I was replacing was red or black.
Here is an image showing the repair to the right hand rear marker light, you can see the color matched wiring along with the heat shrink tubing bridging the splice. I need to open up the right hand side tail light, because it is not lighting up, but it may be something as simple as a burned out bulb. After checking the right hand tail light with my digital multimeter I am sure that it is getting power, so I am sure it is not a problem with the wiring.
I plan on ordering a rebuilt fuel distributor and warm up regulator this week, so once those come in I should be able pretty close to attemping to start the car for the first time. In the mean time I plan to keep working on the wiring, because only a single door light on my passengers side is currently working. It is most likely just some burned out bulbs and corroded connections, but I need to take a look and find out. I also need to re-assemble the fuel tank, which now that I have all of the parts should be relatively straight forward.
Wednesday, April 14, 2010
Its been a week since my last post, so I figured it was time to provide an update. I have been working on the car, but the midwest spring weather has been working against me, and the yard has started to require spring maintenance which sucked up the weekend before this last one. Then this past weekend we had relatives in town, so we were entertaining the whole weekend.
I did manage to work on a few things. One of the main things I have been working on is refurbishing the fuel tank closing plate. This required a lot of sanding, applying primer, painting, sanding a bit, then painting some more. It is starting to look pretty good, but I still have some work to do on it. I will take a picture once it is done so that you can see how nice it looks. It is looking almost like new!
I've also been working on removing the rear fascia, so it can be prepped and painted. I've decided to have the front fascia painted on the car because it is a real pain to get on and off and there is no real reason to take it off consdering the amount of effort. On the other hand the rear fascia comes off relatively easy, and it will definitely be easier to paint off the car, so its coming off. I have all of the bolts and screws removed for the rear fascia, I just need to pull it off now.
In other news the rest of my parts came in so that I can re-assemble the fuel tank now; I finally have everything I need. I also pulled off the fuel distributor to see if I could "un-stick" the plunger -- this was a no go, it is really stuck! I will have to add a rebuilt fuel distributor to my next parts order. While I am at it I might just order a warm up regulator (CPR), because it is likely going to cause trouble too. I am going to get the injectors cleaned when I return the fuel distributor for the rebuild. The last part of the fuel system is the accumulator, and I'm going to wait and see if I really need to replace it or not, otherwise the entire fuel system on this car is going to be basically brand new.
Monday, April 5, 2010
Power at the Pump and more...
I am waiting for a few parts to show up before I re-assemble the fuel tank. While I was doing the final clean out of the fuel tank the breather wire broke off on me and I did not want to assemble anything until that shows up. So today I continued my work on the electrical system of the car. It doesn't require any parts except what can be found at the local harware store: some size 14 wire, solder, and some heat shrink tubing.
I started by putting the main harness back together. In my previous post I mentioned that I had found the reason that my fuel pump was not getting power, and it was because an animal had chewed through the white/purple wire that provides the hot (+) feed to the fuel pump. Ofcourse to to fix the main harness required pulling out the drivers side seat so that I had enough room to work. It needed to come out anyway, due to the fact that it needs to be recovered. In the picture on the left you can see the reconnected white/purple wire pulled out on the right of the other wires. I like to use the heat shrink tubing because it adds a lot more strength to the splice, should someone else need to yank the main harness back throught he firewall in the future, this wire will easily hold.
After I completed the splice, I re-wrapped the harness in black electrical tape, so unless someone really looked closely it would be very difficult to see where this repair occured. I also re-wrapped the other spots on the harness where I had unwrapped the main wiring harness to test where I did, and did not have power. After pulling the main harness pack forward into the winshield wiper resevoir box I reconnected the main harness to the front harness and a quick test with my digital multimeter at the fuel pump plug showed 12 volts! It was a lot of work to resolve a small issue, but I want to do this right so fixing this wiring was critical so I could return the fuel pump wiring to stock.
When I went to re-assemble the windshield washer resevior I also noticed that the resevior tank was cracked! Then I figured while I was at it I should make sure my windshild washer pump worked, so I hot wired the waher pump to the battery, and found out that was not working either! Two new things to add to my parts order. These are the sorts of little gotchas that drive up the cost of restoring one of these cars. Every time I dig into something new I find something that needs replacing or is not right.
I also started to repair the rear harness for the tail lights and side marker lights because they were also chewed up. I re-connected the drivers side marker light and was disgusted to see that is was not working after my repair. A quick inspection of the fuse box and I realized that fuse #8 was blown, and I don't have any extra 10 amp fuses to replace it with, so I will have to run to the harware store tomorrow and pick up some more fuses. So instead, I began to investigate why the fuse might have blown in the first place, and found even more wiring that is hidden underneath the area between the tail lights that is badly chewed up and will need repar as well. I am going to get a lot of practice soldering!
At that, I called it a night. I will work on splicing the tail light harness back together tomorrow, and hope to finish that up.
Subscribe to:
Posts (Atom)